How to Fix Spotify Error Code 4 [2025 Complete Guide]
Spotify being one of the best high-quality music providers containing millions of songs has been very popular to a lot of music fans all over the world. But despite the fact that it is one of the best, it still has some drawbacks which you will find a little bit disappointing especially if you are paying a monthly subscription just to be able to listen to your favorite tracks without any interruption. Problems like Spotify error code 4, which is the usually experienced issue by Spotify users, could be encountered.
If you have encountered Spotify error code 4 and definitely do not want to experience this anymore, have the time to read this entire post because you might find the solution or method that will perfectly work for you. I have discussed here the different methods to try as well as the corresponding steps to follow in executing the methods.
Article Content Part 1. What Is Spotify Error Code 4 And The Causes Of It?Part 2. How To Fix Spotify Error Code 4?Part 3. Bonus: Play Spotify Music Offline To Avoid Spotify Code 4 IssuePart 4. Conclusion
Part 1. What Is Spotify Error Code 4 And The Causes Of It?
If you have encountered the words “No internet connection detected. Spotify will automatically reconnect when it detects an Internet connection” while launching your Spotify app, then you are having the problem with Spotify error code 4. But what exactly is Spotify error code 4? It is a common problem usually encountered by Spotify users if they are having any issues with their Internet connection. The bad news here is that even those who have their Internet connection working just fine are mostly experiencing the same problem.
Now, the question is what causes Spotify error code4? The cause could be the settings of your Internet connection, with DNS settings in particular or it could be the firewall settings or the antivirus application installed in your used device, or maybe that your Internet connection was just that bad or damaged. In order to solve issues regarding Spotify error code 4, I have explained in the next section the methods that you can make use of to avoid having a headache because of this issue.
Part 2. How To Fix Spotify Error Code 4?
Not all the time, you can experience your expected smooth way of listening to your favorite Spotify songs and tracks. There are times that you will encounter some problems and issues like the most experienced problem while using Spotify which is the Spotify error code 4. However, on the good side, there are ways that can possibly be of great help on how to solve Spotify error code 4. See the list below explaining all the alternative methods that you can use to avoid and be able to successfully surpassed the said problem.
Method 1: Using A Different DNS
For those who are using Spotify, most especially those who are using it for free, the need for a stable Internet connection is a must, or else you will non-stop encounter Spotify error code 4. And in most cases, Spotify error code 4 is caused by DNS server issues. One way to solve it is to make use of different settings of DNS. Here are the steps that you have to follow.
On Windows:
Step 1. On your keyboard, click on the key of “Windows” plus the key of “R”. Clicking on these two buttons simultaneously will lead you to the “Run Dialog box” where you have to input “ncpa. CPL”. Once done with typing, you then have to tap on the “Ok” button to have the settings of your Internet connection opened in the Control Panel of your computer.
Step 2. If you find the process in step number 1 a little bit complicated to do, you may try it manually by heading into the Control Panel of your computer. After that select the button “Network and Internet” and then “Network and Sharing Center”. From the new page displayed on your screen, take a look at the upper left corner and locate “Change adapter settings”. Once found, click on it.
Step 3. Either one of the two methods mentioned above will lead to opening the window of Internet connection. Now that the window is opened already, select the Network adapter you are using. You should take note that you have to double click on it to proceed into the next set of options.
Step 4. From the list of options presented next, click on the button of “Internet Protocol Version A (TCP/IPv4). And if it happens that you are given permission, you may also have to click on the button of “Properties”.
Step 5. Once you have clicked the properties of “Internet Protocol Version 4 (TCP/IPv4)”, you will see two tabs under it namely the “General” and “Alternate Configuration” tab. Click on the “General” tab and then tick on the small circle that you will see beside “Use the following DNS server addresses”. Tapping on this button will automatically change the said subject if you have initially set it to another one.
Step 6. Now that you have switch the button, you will see two descriptions below it namely “Preferred DNS server” and “Alternate DNS server”. Just change the “Preferred DNS Server” into 8.8.8.8 and 8.8.4.4 for the “Alternate DNS Server”.
Step 7. Below these two descriptions, you will see “Validate settings upon exit” with a box beside it. Just tick on that box before clicking on the “OK” button. Clicking on the “OK” button will save the changes you have made with your DNS server.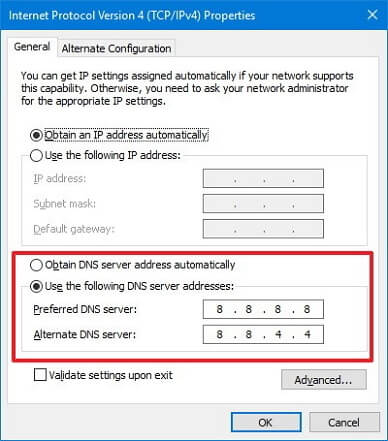
On Mac:
Step 1. Access "System Preferences" and select "Network".
Step 2. Choose "Advanced..." in "Network" settings and then select "DNS".
Step 3. In the section labelled "DNS Servers", select the "+" symbol to swap any current addresses with the Google IP addresses at the head of the list, or include the Google IP addresses: 8.8.8.8 and/or 8.8.4.4.
Step 4. click "OK" to confirm the changes. Restart the Spotify application, and the issue with Spotify error code 4 is expected to be resolved.
Method 2: Changing The Proxy Type In The Settings Of Your Spotify
Spotify offers other proxy settings to adjust how the app connects to the internet. Typically, selecting "HTTPS" resolves Spotify error code 4 issue. However, automatic detection may also be effective. Don't give up before trying several options on the list. Here are the steps to take if you wish to utilize this method.
Step 1. Has your Spotify app opened in the device you are using either by clicking on the shortcut key of the Spotify app on your desktop or by having it searched in the Start menu?
Step 2. Now, on the page displayed on your screen after having a failed attempt in signing in and where you will encounter Spotify error code 4, look for the button of “Settings”. Right after finding it, click on its button.
Step 3. After clicking on the button of “Settings”, look for “Proxy” and then “Proxy type”. From the set of options shown after clicking the drop-down menu, click anything. You should take note that you will be doing a trial and error this time until the Spotify error code 4is not appearing anymore. You just have to save your changes after choosing an option to test the appearance of Spotify error code 4.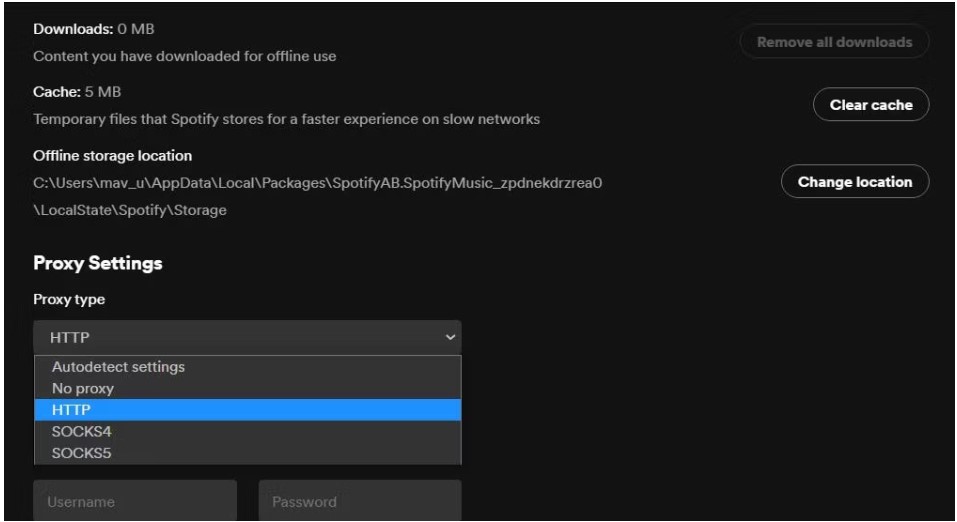
Method 3: Including Spotify To The List Of Antivirus’ Exceptions
Some who have installed an antivirus app on their devices may experience a hard time because of the automatic scanning of antivirus. Most of the time, it does not let the Spotify app be connected to the internet leading to Spotify error code 4. So, how do you fix error code 4 on Spotify? If you think that the only solution to this is to uninstall your antivirus app, then you must think differently because you will no longer need to have it uninstalled. The only thing that you have to do is to add your Spotify app to the list of applications exempted from the automatic scanning of your installed antivirus. Here are the steps to follow in order to do this.
Step 1. The first step that you need to do is to have the main interface of your used antivirus app opened by searching for it in the Start menu. Or you can just have the app’s icon double-clicked on the set of icons that will appear after you have clicked on the lower right part of your taskbar that is visible at the very bottom of your window.
Step 2. Then the next step to do is to look for the “Exception Settings”. The location of this option may vary depending on what kind of antivirus app you have used, but you do not have to worry for it will not give you that much hard time locating it. For those who have used “Avast”, you only have to click “Home”, then “Settings”, then “General” and then “Exclusions”. On the other hand, for those who have utilized “AVG”, just click on “Home”, then “Settings”, then “Components”, then “Web Shield” and then “Exceptions”. And for those who are using “Kaspersky Internet Security”, just click on “Home”, then “Settings”, then “Additional”, then “Threats and Exclusions”, then “Exclusions”, then “Specify Trusted Applications” and then “Add”.
Step 3. After doing so, you will now have to select and add the executable file of Spotify on the dialog box that will appear automatically once you have done step number 2. This will lead you to find the location of your Spotify app. You can have this easily located by just right-clicking the Spotify’s shortcut key on your desktop and selecting the option of “Open file location” from the list of options presented after you have right-clicked on it.
Step 4. Now that you have done the steps, try doing a trial test if you are not experiencing Spotify error code 4 If it happens that you are still having the problem with regards to Spotify error code 4, you may have to try installing another Antivirus application and then just repeat the steps above.
Method 4. Reinstalling Spotify
Some of the problems can be fixed by having the application uninstalled and then returning it again on the device used. Now, if the methods listed and explained in the previous section did not successfully remove your problem about Spotify error code 4, then you may try the said solution a while ago which is to delete the Spotify app and return it again after a few minutes. But make sure that before you execute this process, you have already a copy of the song files you have saved in Spotify. Below are the simple steps to follow to make this happen.
Step 1. Has the Spotify application been removed from your used device?
Step 2. Get the Spotify app from the application store or from Spotify’s main website.
Step 3. Download the app and have it installed and running on your device again. After doing so, sign in to your account in Spotify.
Part 3. Bonus: Play Spotify Music Offline To Avoid Spotify Code 4 Issue
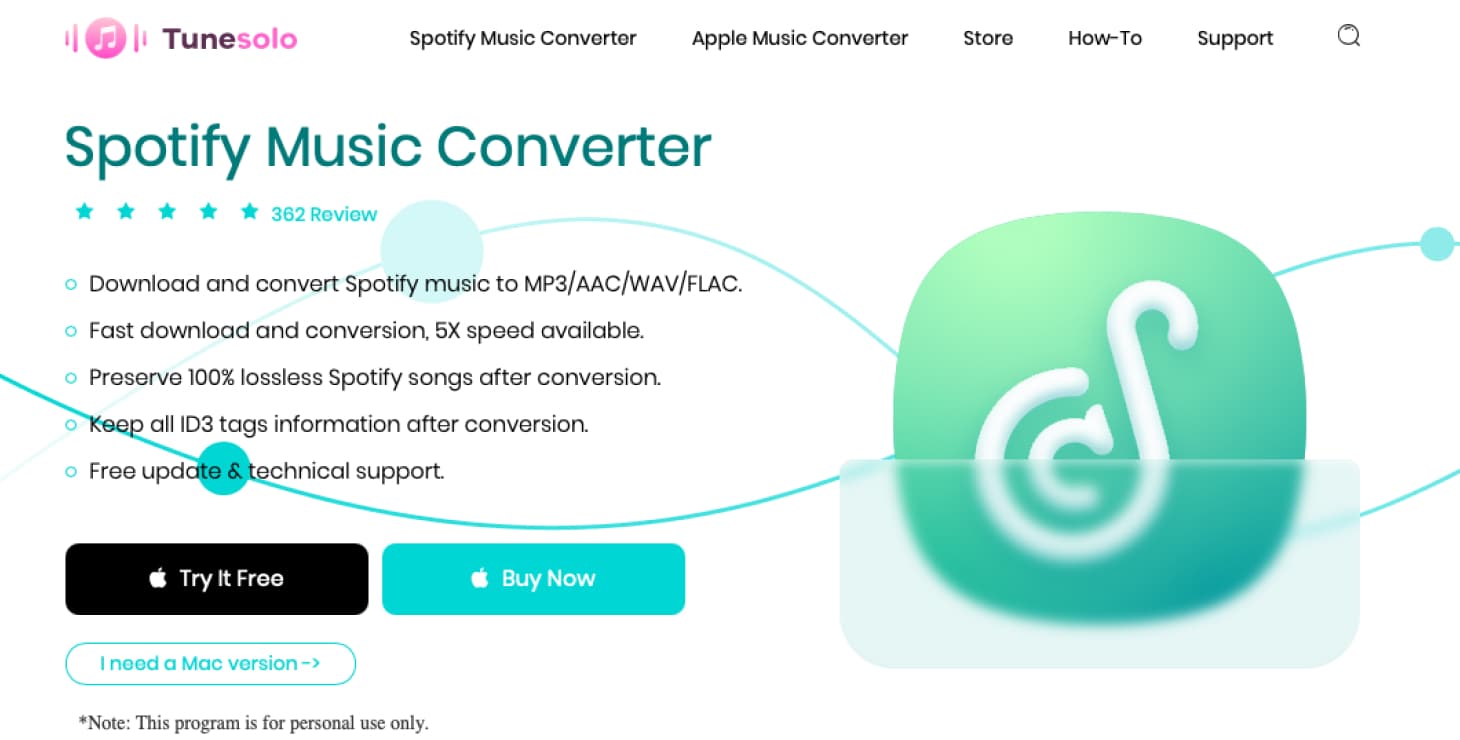
Once you have tried the above-mentioned methods in order to deal with Spotify error code 4 but did not successfully get the results expected, the last option remaining but is definitely the most effective and the most likely to get the job done is by using “TuneSolo Spotify Music Converter”. This Spotify Music converter will assist you to convert the songs into an audio format that you can play without having the need to connect to a network. So, before the steps follow, let us first learn the star features of “TuneSolo Spotify Music Converter”.
- Convert Spotify songs into any another audio formats. The first feature of “TuneSolo Spotify Music Converter” which deserves to be commended of is its capability to convert your most loved Spotify songs to MP3, AAC, WAV, FLAC format, and many more. If you have finally converted the songs into another audio format, you will be able to play them in any audio player you have even without connecting your device to the Internet.
- Play Spotify songs offline without any restriction. Spotify’s service of downloading the songs and offline listening to them is for the Spotify Premium subscribers alone. If you are just using the app for free and do not have a subscription then you won’t be able to download any song from Spotify. But fortunately, with “TuneSolo Spotify Music Converter” present, you can have these songs saved on your device and be able to play them offline even without paying a monthly subscription.
- Preserve Spotify metadata information and ID3 tags. With “TuneSolo Spotify Music Converter”, all the most significant information of the songs is protected. Important identification info of Spotify songs such as Metadata information and ID3 tags are kept while using “TuneSolo Spotify Music Converter”.
- Fast speed of conversion. Another thing to be happy about about using “TuneSolo Spotify Music Converter” is that you do not have to wait that long until the finish of the process. It does the job five times quicker than the most usual conversion speed. This is literally allowing you to save much more time from waiting.
- Preserve Spotify audio quality. If your worry is about the quality of the songs after converting them, then you do not have to think a lot about that anymore. “TuneSolo Spotify Music Converter” can guarantee you 100 percent the best quality audio that you would ever have.
- Organize downloaded Spotify songs. You can also arrange your output folders based on what you prefer to have. You can have them sorted or arranged by artist or by album. This is definitely a big help to locate one particular file in mind easily leading to saving a lot of your time as well!
- Professional technical team. Lastly, you can always have the support of the technical team whenever you need them. You are also entitled to unlimited updates for free!
Now, here are the steps that you have to follow in order to play Spotify music offline to avoid Spotify code 4 issue
Step 1. The first thing that you must do is to download “TuneSolo Spotify Music Converter”. You can always get this app from the application store or just by clicking the safe button below. Now that you have the app downloaded, have it installed and running on the device you are using.
Step 2. The next step is to upload the Spotify song files into the converter. So, in order to do this, you can just have the song files dragged and dropped into the converter. You can just also copy and paste the song links into the converter.

Step 3. After uploading the files into the converter, the next step to do is to select the best output format that would work for you.
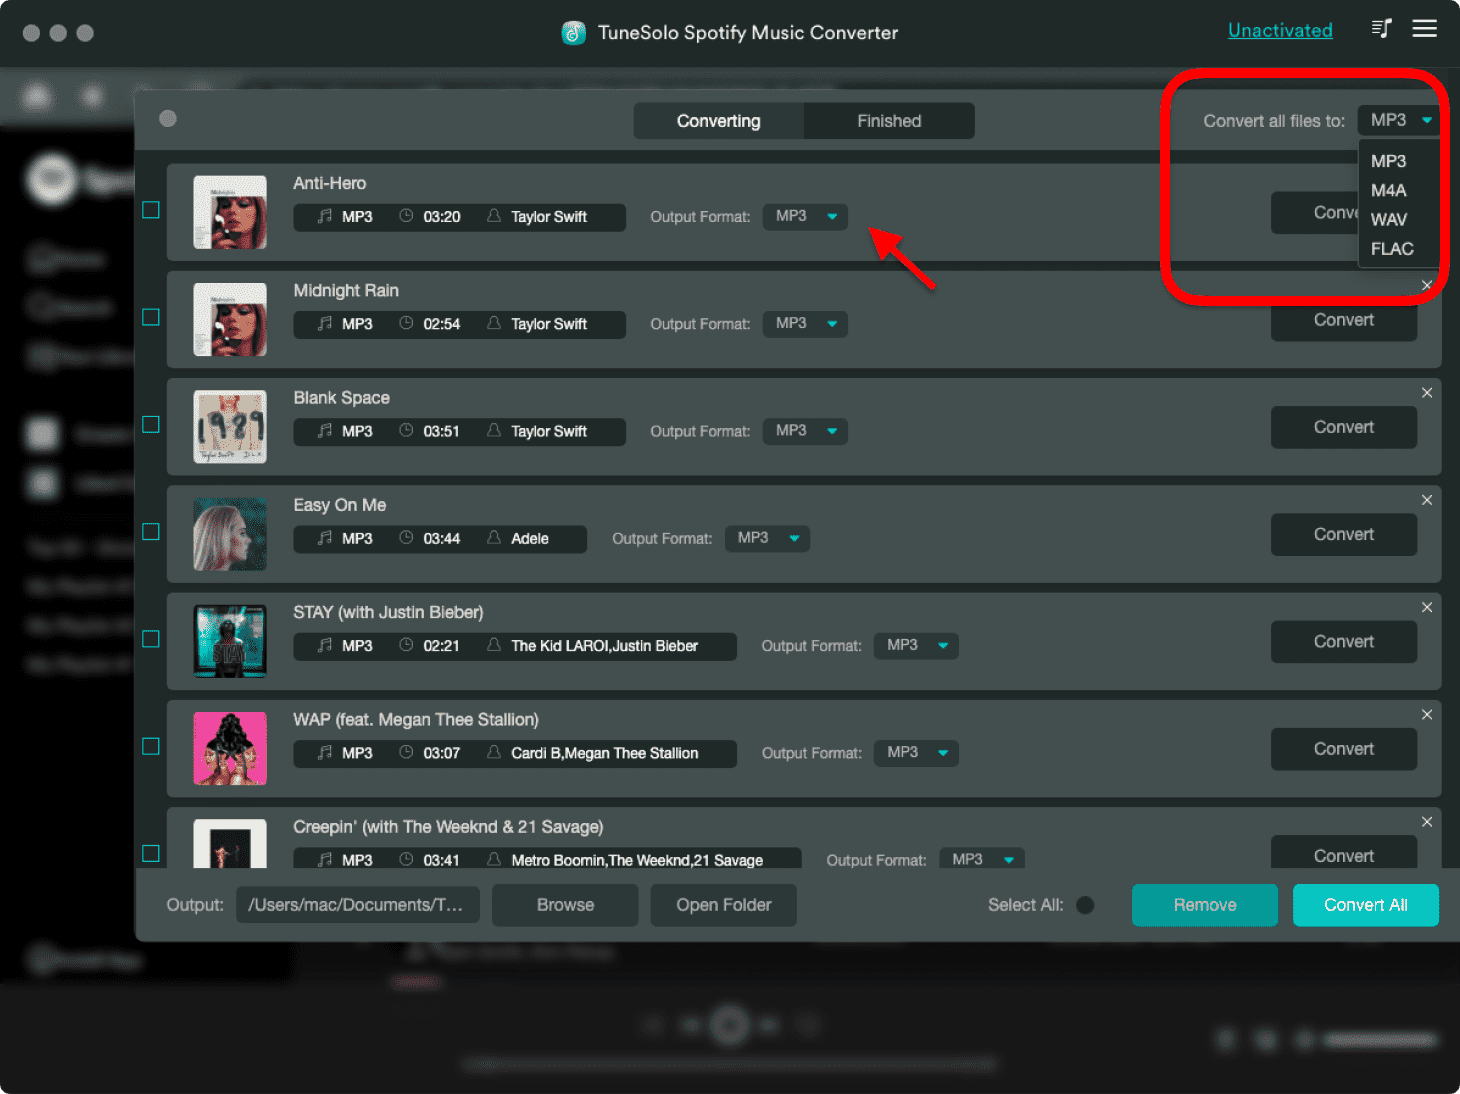
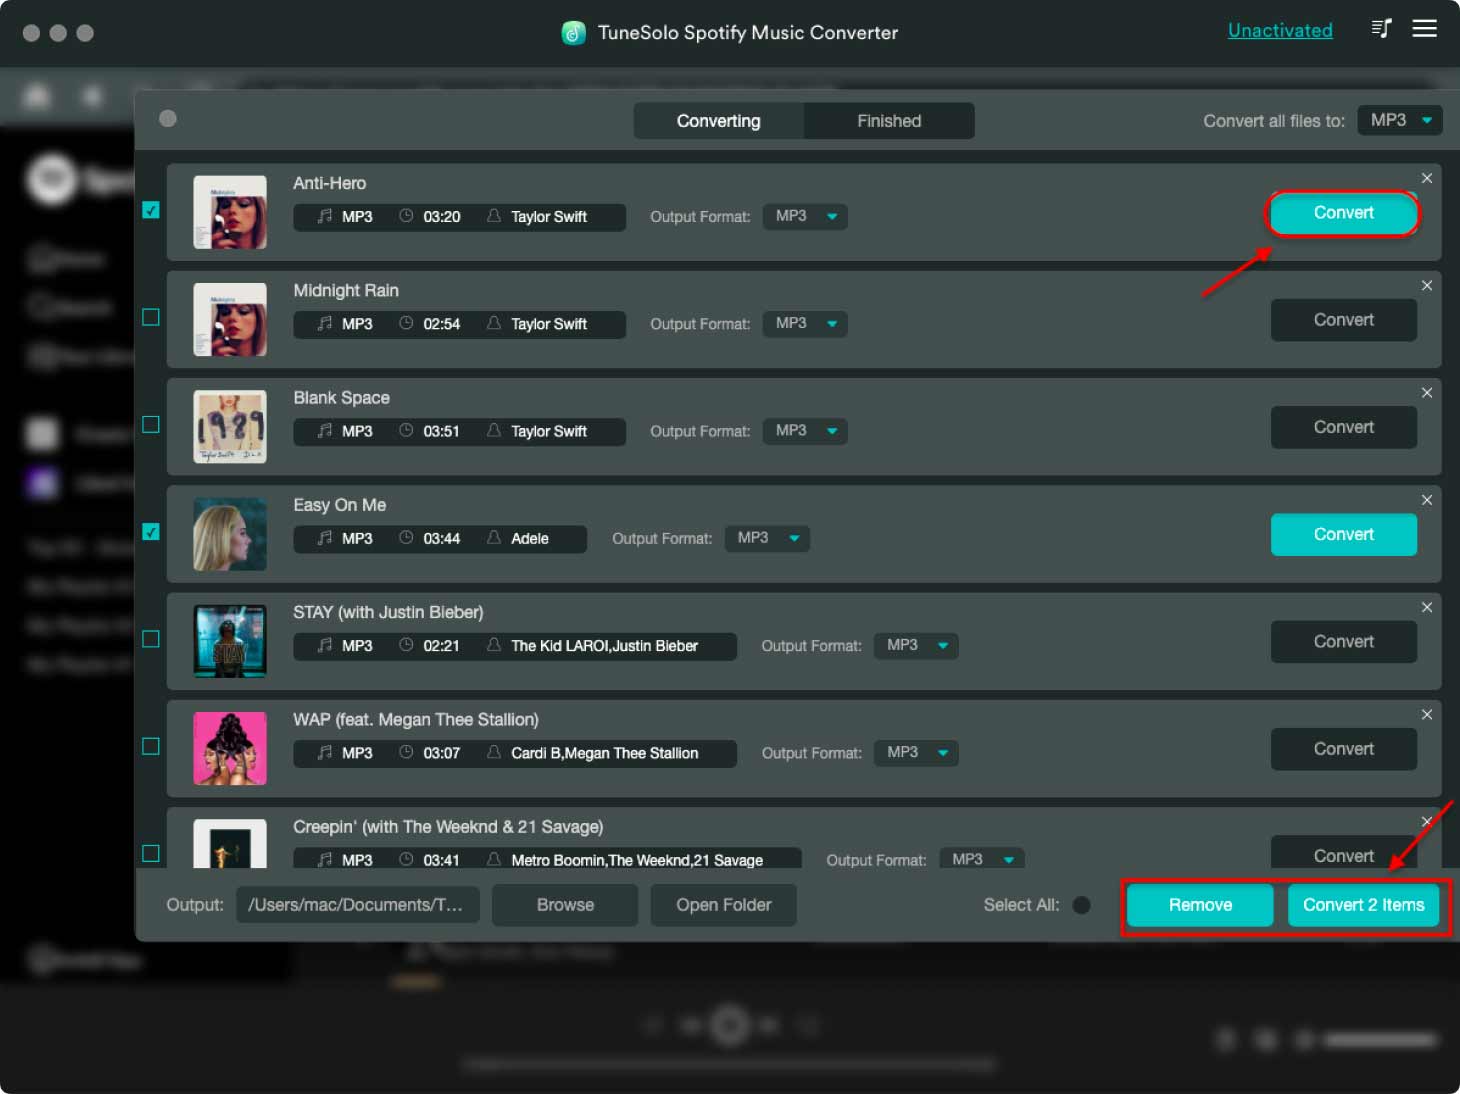
Step 4. After doing so, you now have to click on the button “Convert All” to finally start the entire process of conversion.
Step 5. Now that the conversion was finished, if you wish to check and get the successfully converted songs, just click on the button “View Output File”.
Now that the conversion of Spotify songs is successfully done, you will no longer have to encounter Spotify error code 4 because you can finally have these converted songs played offline.
Part 4. Conclusion
A lot of Spotify users surely would not want to have their time of listening to Spotify music interrupted, but unfortunately, there are really high chances of encountering some problems like the most experienced one which is the Internet-related issue or also known as Spotify error code 4. If you do not want an interruption while enjoying your favorite tracks, the best solution that you could do is to have the songs converted into an audio format that can be played without the need to connect to a network. And if we are to talk about the best converter that could help you make this possible, it is definitely “TuneSolo Spotify Music Converter”. Just follow and understand the guidelines that were discussed above in order for you to utilize this converter properly. Click the safe button below and try it for free now!