How Can I Transfer Apple Music to SD Card for FREE?
Recently, Apple announced that its Apple Music app will now support the synchronization with SD cards. For that reason, many people who use mainly use SD cards for storage are joyous. This came along with some bug fixes to the Apple Music app for Android.
With this update, we can now easily move our music library to extra external storage. This made it easier to free up storage and secure our music library files.
This article will focus on how you can transfer Apple Music to SD card for free. Before anything else, let’s answer one of the most frequently asked questions right now.
Article Content Part 1. Why Do We Need to Transfer Apple Music to SD Card?Part 2. Save Apple Music to SD Card (For Android Users Only)Part 3. Transfer Apple Music to SD Card (For Mac and Windows Users)Part 4. Summary
Part 1. Why Do We Need to Transfer Apple Music to SD Card?
You already have a basic idea of what Apple Music is. It’s one of the most popular music-streaming platforms nowadays. However, there’s more to Apple Music than what’s seen on the surface. So to help you understand, we’ll take a deeper look into Apple Music.
What is Apple Music?
Apple Music was launched in the year 2015; a year after Apple acquired the contract for Beats Electronics. This is a subscription-based service that offers continuous access to in-demand music. Basically, it’s a platform that gives you the ability to stream music.
Their platform offers several tabs where you can see different types of content. In one section, you can discover new music. On another, you can check out music that is tailored to your interests and preferences. You can also save music that you like within the platform.

Limitations of Apple Music
Of course, there are a couple of limitations imposed by Apple Inc. For one, all content located inside Apple Music is embedded with DRM or Digital Rights Management.
What this means for us is that we can’t do anything to the music. We can’t transfer them to our other devices, change their titles, and convert them into other formats, unless we purchase them individually. This is what many people are complaining about. They are not given full access or privilege to the files even though they’re paying for a music subscription.
Why transfer Apple Music to SD card?
Some people think that transferring Apple Music into external storage devices such as SD cards or flash drives isn’t worth the effort. After all, it does take a bit of time to finish the whole process. But I, for one, believe that it’s worth trying to transfer Apple Music to SD card.
Part 2. Save Apple Music to SD Card (For Android Users Only)
It would make sense to think that Apple Music was only available on devices owned by Apple. This includes iOS devices and Mac. But this isn’t the case. It’s actually available for Android users as well. And that is why downloading Apple Music is possible on Android.
Trying to transfer Apple Music to SD card through your Android device should be possible. In fact, it’s even easier with Android than with iOS devices. However, take note that this only works on Android 5.0 and later. Anyway, here are the things that you need first:
- You need an Android with an iOS of Android 5.0 (Lollipop) or later versions
- You need to install the Apple Music app from the Google Play Store
- You need to have an active subscription to Apple Music. You may also sign in for a subscription right now if you aren’t yet
- You have to update your Android device to its latest version and the Apple Music app should also be up-to-date
To get started with the whole process, you need to have an account on Apple. And with that account, you need to have a subscription and we’ll discuss how to opt for a subscription later. We will also discuss how you can get a free trial as an alternative. So without further ado, here are the steps to the first phase to transfer iPhone music to SD card:
- Open the Apple Music app on your device.
- Sign in with your Apple ID and password.
- You may be asked to start a free trial.
Note: If you’re not yet paying for a subscription, you can opt for a free trial instead. The free trial will last for three months before expiring.
- Select the subscription that you want to pay for.
Note: If you want to pay for a subscription, you will also see four options including a (1) Monthly Individual Subscription, (2) Yearly Individual Subscription, (3) Family Subscription, and a (4) Student Subscription.
- Sign in again and if you’re prompted, enter the verification code that should be texted to the number that you used for the account.
- Enter the payment method and your payment preferences.
- Read the terms and conditions and click on Agree if you agree to it.

Now you might be asking, “Where is downloaded Apple Music stored on Android?” For that, you have to locate the songs which is usually found in the Downloads folder. You can do this by searching for it on the Search section or finding it manually on the Browse section. Either way, you should be able to see that song on this platform.
Once you’ve found the song, simply click on the Download button. This should look like an icon of a cloud with a downward arrow on it. This will save the Apple Music into your phone’s internal storage and all you have to do is transfer that music file into your SD card.
Part 3. Transfer Apple Music to SD Card (For Mac and Windows Users)
Although many people say that it’s difficult, it’s actually very easy to transfer Apple Music to SD card. Yes, it’s a given that the DRM protection makes things more complicated, but that’s precisely why software like TuneSolo exists.
TuneSolo Apple Music Converter is a program designed to remove the DRM protection on files from iTunes. This includes audiobooks, podcasts, and most importantly, Apple Music.
With this ability, you can transfer Apple Music to an SD card or to any other external storage device.
This is a paragraph
Below are some of its other features as well as its main feature.
Main Feature:
- DRM Removal. As previously said, you can use TuneSolo to remove the DRM protection embedded within Apple Music files. With the DRM protection removed, you will be able to do whatever you want with the files, even transfer them to SD card

Other Features:
- Offline Listening. It’s also possible to access the files without the internet, as long as you have downloaded them properly. These files can also be transferred to other devices such as PSP, Xbox, iPhones, iPods, and even external storage drives such as flash drives, SD cards, and other drives
- Faster Conversion. TuneSolo is known for having a fast conversion speed. Particularly, it can go up to 16 times the speed of normal converters. The software also offers batch conversion which allows users to download or convert multiple files at the same time
- Unlock Premium Content. Lastly, TuneSolo can unlock content that is otherwise unavailable to people who aren’t paying subscribers. This means you can use TuneSolo to access content for free, but of course, there are limitations.
Attention: We recommend you try the new version of Tunesolo Apple Music Converter this 2023 because the tool no longer requires syncing with iTunes to process offline music conversion anymore! We have a built-in Apple Music web player to make converting and downloading more easier!
Now that you’re aware of the capability of TuneSolo, it’s time to find out how this software works. Let’s proceed with the steps on how to put music on SD card from Mac:
Step 1. Select Apple Music Files
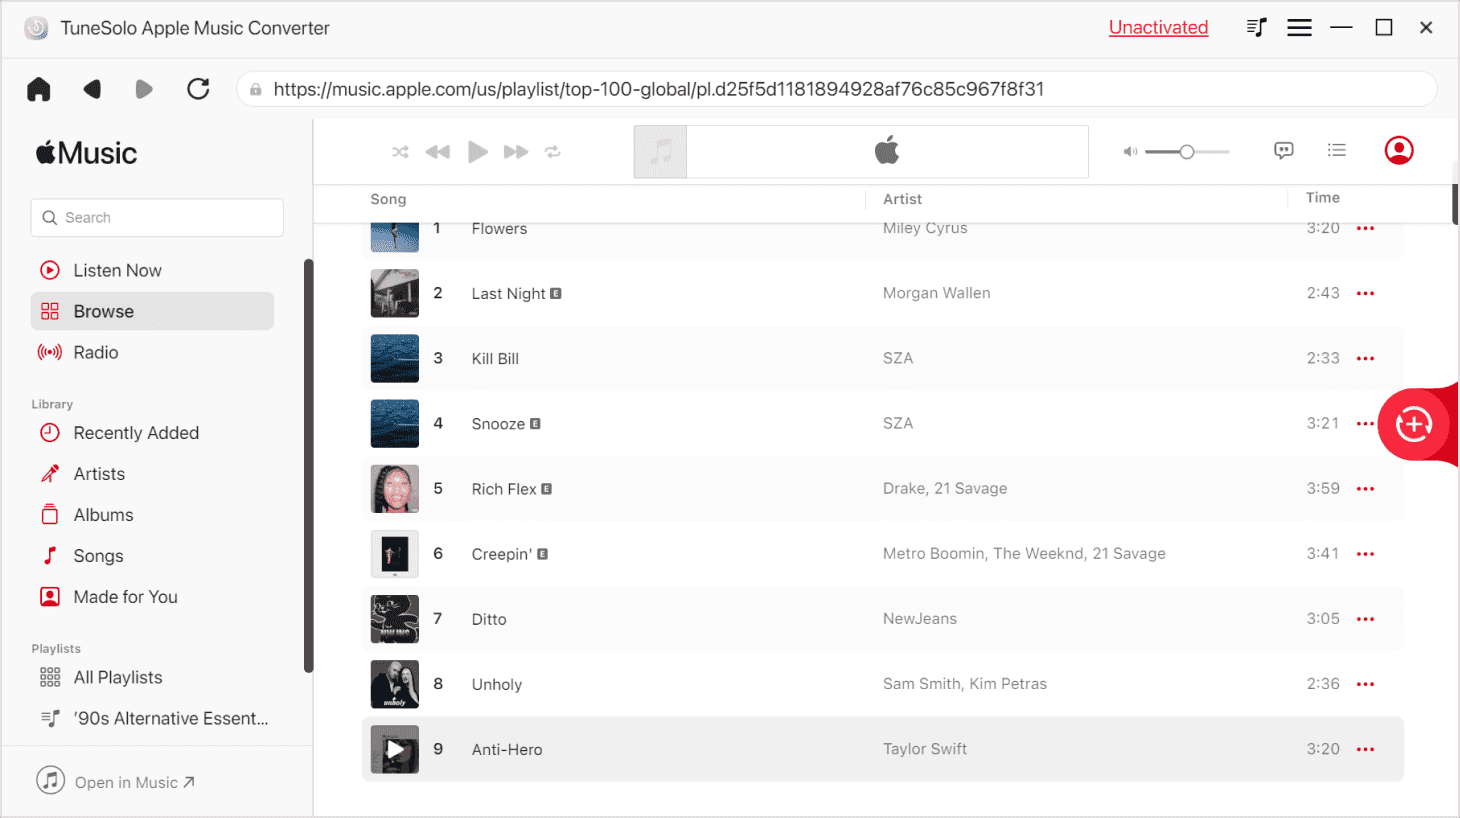
First of all, make sure iTunes is already installed on your computer. Once you have confirmed it, proceed by opening the TuneSolo software. The first thing that will greet you is a list of titles. From this list, select the Apple Music songs that you want to transfer to your SD card.
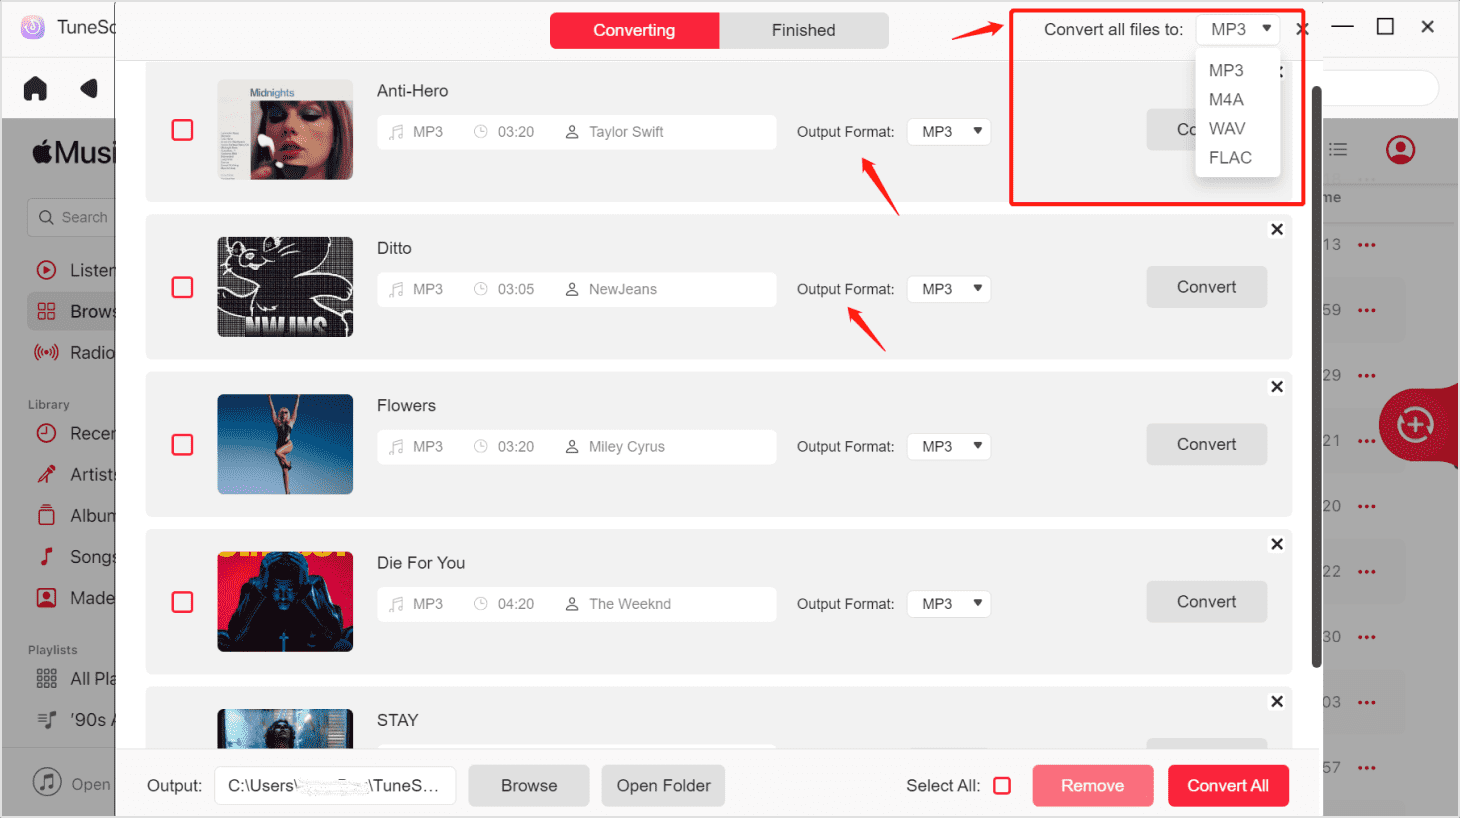
Step 2. Configure the Output
After selecting the files, scroll down until you see a section called Output Settings. This is where you can change the codec, format, quality, and other properties. Simply change it the way you want.
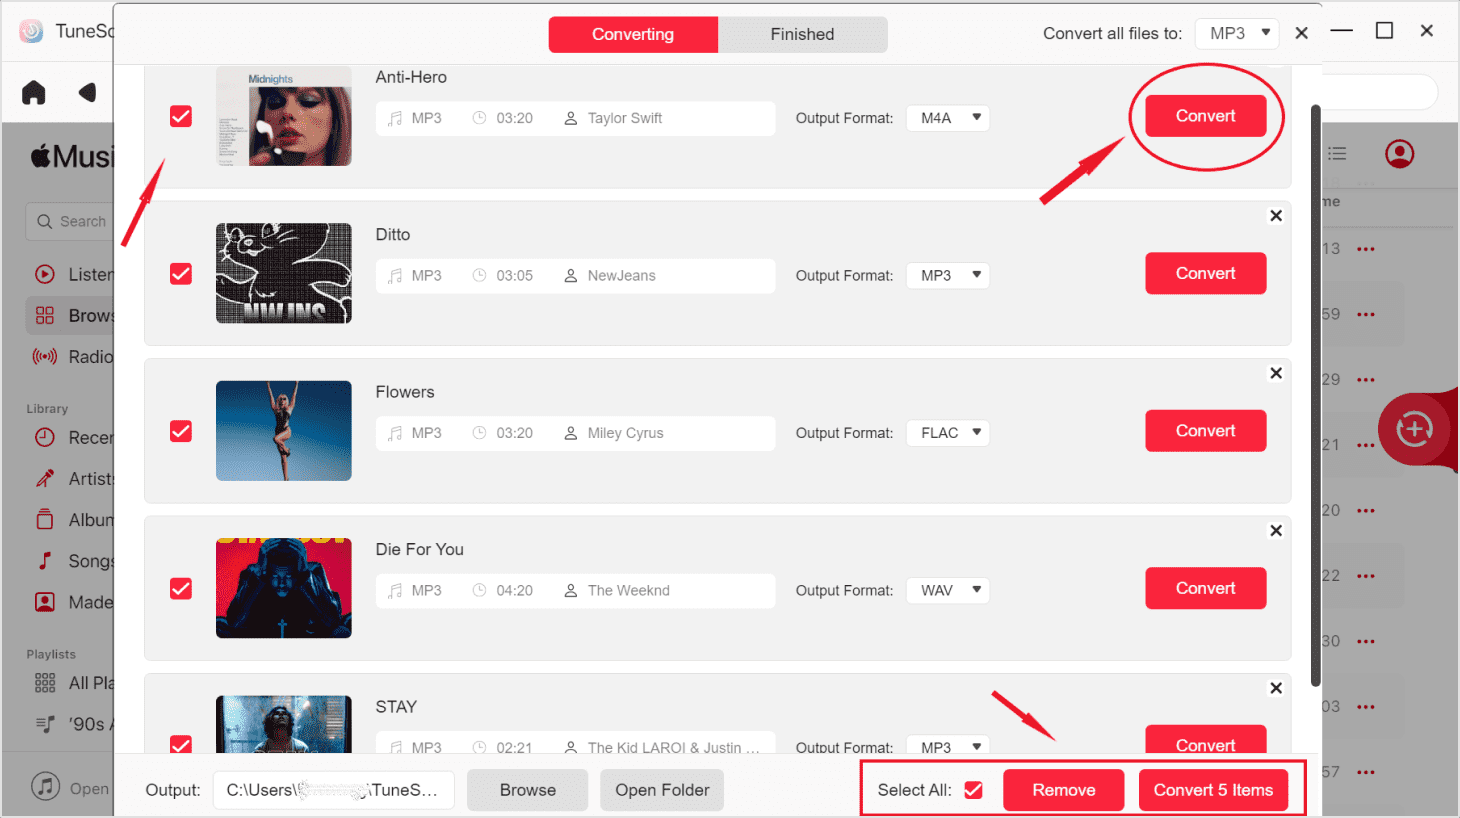
Step 3. Download Apple Music
After selecting the files and configuring the settings, click the Convert button. This will start the conversion and download process. All you have to do now is to wait until it’s done.
Step 4. Transfer Apple Music to SD Card
Finally, locate the downloaded files on your computer. Once you’ve located them, connect your SD card to the computer. Next, drag and drop the downloaded files into the SD card.
Tip: Please make sure that Apple Music/iTunes is closed before opening Apple Music Converter. And during the song conversion, please do not do any operation on Apple Music/iTunes.
Part 4. Summary
There are several ways to transfer Apple Music to SD card. There are free methods and there are methods that you have to pay so you can copy albums from iTunes to SD card. It’s up to you which you choose.
However, remember that you should always keep a backup of your Apple Music library. After all, you don’t know what will happen in the future. You don’t want to be one of the people who lose their entire library just because they’re too lazy to create a backup, do you?