Best Methods to Transfer Music to Fitbit Versa from iTunes
Multiple devices have been used in streaming music and using them in such applications is indeed great. However, people are also starting to love using some handy and more portable devices in listening to music. One great example of such an audio player is the Fitbit Versa smartwatch. But, does Fitbit Versa support music streaming? How to transfer music to Fitbit Versa from iTunes? Is there a possible way in doing such?
To know more about Fitbit Versa and the steps on how to transfer music to Fitbit Versa from iTunes, make sure to continue reading the remaining sections of this post.
Article Content Part 1. Can You Put iTunes Music on Fitbit Versa?Part 2. How to Transfer Music to Fitbit Versa from iTunes?Part 3. Best Way to Transfer Songs to Fitbit Versa from iTunes/Apple MusicPart 4. Conclusion
Part 1. Can You Put iTunes Music on Fitbit Versa?
Before we answer the question above if it is possible to put iTunes Music to Fitbit Versa, let us have first a brief description of what a Fitbit Versa is.
A Fitbit Versa is a smartwatch that is very useful in knowing the progress of your health such as monitoring fitness activities. This has quickly gained a lot of attention from the people for this kind of advantage. In addition to this, it also supports music streaming. You can even store a lot of tracks of different formats such as MP3, WAV, MP4, WMA, and more.
The total number of tracks that you can save in your Fitbit Versa is about 300 tracks. Another great thing about using Fitbit Versa is that you won’t have the need to charge it most of the time because it can last up to 4 days through the help of its long battery life. Fitbit Versa has a sturdy and resistant design and is also waterproof.
So, moving into the main question, if it is possible to put iTunes Music to Fitbit Versa, the answer is yes, it is! If the procedure is possible, the question now should be how to transfer music to Fitbit Versa from iTunes?
The detailed procedure on how to transfer music to Fitbit Versa from iTunes will be discussed in the coming section of this post.
Part 2. How to Transfer Music to Fitbit Versa from iTunes?
In the previous section, you have learned about the basic details that you should know about Fitbit Versa. In this part of the article, we will be tackling about the recommended method that you may use on how to transfer music to Fitbit Versa from iTunes.
The transferring of music files from your iTunes application into another device is not just a simple procedure that you can do directly. The tracks that you have purchased from iTunes are protected by DRM and are mainly responsible for the difficulty that you experience in moving the songs. So, in order to proceed, you would have to save the songs on your computer first and then sync them into your Fitbit Versa.

So, what exactly is the method that you will use on how to transfer music to Fitbit Versa from iTunes? Check out the methods explained below and be able to stream your favorites in your Fitbit Versa.
Transfer Music to Fitbit Versa Through Fitbit Connect
The first method that you may utilize is through the help of the Fitbit Connect application. You will not be able to proceed with the procedure if you do not have Fitbit Connect installed on your device, so, if you do not have the application yet, the first thing that you should do is to download and install it on your device.
Here are the steps how to transfer music to Fitbit Versa from iTunes using the Fitbit Connect application.
- With the help of a USB cable, have your iPhone and computer connected to each other. Right after that, on your computer, open your iTunes app. Take note that it would be a lot better if you have the latest version installed on your computer.
- From the iTunes app, at the toolbar above, locate the Edit tab and click on it once found. After hitting on the mentioned tab, a set of options would be shown wherein you will have to click on the Preferences option.
- After that, click the Devices option next. Before proceeding into the next step, you also have to make sure that you selected “Prevent iPods, iPhones, and iPads from syncing automatically”.
- Once done, you may now navigate into the iTunes store and then hit the button saying “Authorize This Computer”. After doing so, you will be required then to fill in or provide some important details including your Apple ID and password.
- The next step is to click on the File button. From the list of choices, click the Devices option and then select next to the option of “Transfer Purchases from your device name”.
- After hitting on that, the iTunes menu bar will automatically be opened next. All you have to do now is to click the Edit tab and then Preferences. From there, you will have to select the Advanced Menu and be able to see the iTunes media folder that is included in the menu listed under the iTunes Media folder location.

- From there, you may now start selecting each track that you wish to copy and then proceed on pasting them in one of the folders on your computer. These music files are now considered local files on your used device.
You are already halfway from making the procedure how to transfer music to Fitbit Versa from iTunes successful. In order to have the process complete, you have to transfer these locally saved files into your Fitbit Versa. The steps enumerated below will explain the process of how to transfer music to Fitbit Versa from iTunes.
- You have to check if you have a Fitbit app installed on your device. If you do not have the application yet, install it on your computer first. After the installation of the app, make sure to sign in using the same details you used on your Fitbit Versa.
- The next step to do is to make a new playlist and move all the iTunes tracks that you wish to be copied. Once done, copy and paste this playlist on the installed Fitbit app on your computer.
- You have to check now if your Fitbit Versa and used computer are both using the same internet connection. If not, you have to make it that way.
- Now, download and install Fitbit Connect on your computer as well.
- On your PC, check if Bluetooth has been turned on or not. If yes, you must turn it off. Once done checking, it is now time to transfer your Fitbit Versa on the Fitbit app you installed.
- By this time, the Fitbit Connect should be running on your PC’s system. If it is already okay, click on the option of “Manage My Music” that you will see on your screen.
- Now, switch back to your Fitbit Versa and click the Transfer My Music option. Hitting on the tab will automatically create a connection between your computer and Fitbit Versa. You will just have to wait for a few minutes.
- A set of instructions will be shown on your screen whose intention is to help you in completing the process. Use these instructions as your guide in selecting all the iTunes tracks and playlists that you wish to get transferred. After a few minutes, they will already be copied into your Fitbit Versa.
And that is it! You just have successfully done doing the procedure of how to transfer music to Fitbit Versa from iTunes through the help of Fitbit Connect. But, aside from it, is there another possible way of doing the procedure of how to transfer music to Fitbit Versa from iTunes?
In transferring the music files, there are other methods that you may utilize aside from the discussed. You may use transfer in doing the procedure. It has the capability to save or transfer the files from your iPhone into your computer directly.
Another tool that you may utilize is the iTools app which is very skilled as well in transferring not just music files but also photos, documents, voice memos, contacts, other files, applications, and videos from iPhone to your computer.
After successfully transferring the iTunes playlists into your computer and saving them as local files, you will have to make use of Fitbit Connect to finish the process of how to transfer music to Fitbit Versa from iTunes.
Part 3. Best Way to Transfer Songs to Fitbit Versa from iTunes/Apple Music
The previous methods tackled are all of the great help. But if in case you are looking for an alternative method that can help you save the tracks in your device forever and a method that would be a lot easier to do, you should consider using the professional tool, TuneSolo Apple Music Converter.
TuneSolo is very capable of removing the DRM copy protection from iTunes/Apple Music tracks and playlists which is the one mainly responsible for having the files not accessible and downloadable on just any device. Once the files are DRM-free, you may now be able to convert them into another audio format including MP3, WAV, FLAC, and M4A.
With the help of TuneSolo Apple Music Converter as well, you can have the songs downloaded on your computer as local files. These saved local music files could now be transferred and copied from your device to another, so, you can use more than one device of your choice in streaming the music. Finally, you may now be able to move the tracks in your Fitbit Versa smartwatch.
Note: We recommend you try the new version of Tunesolo Apple Music Converter because the tool no longer requires syncing with iTunes to process the offline music conversion anymore! It has a built-in Apple Music web player to make online converting and downloading more easier!

After learning about TuneSolo Apple Music Converter, let us now discuss the steps to be followed on how to transfer music to Fitbit Versa from iTunes using this notable converter.
Step 1: You have to visit the official website of TuneSolo and get the application of TuneSolo Apple Music Converter from there. You might be asked about some requirements in order to proceed to download the application. Just fill in or provide the details needed and download the app. If it is already downloaded, make sure to install and launch it on your used device.
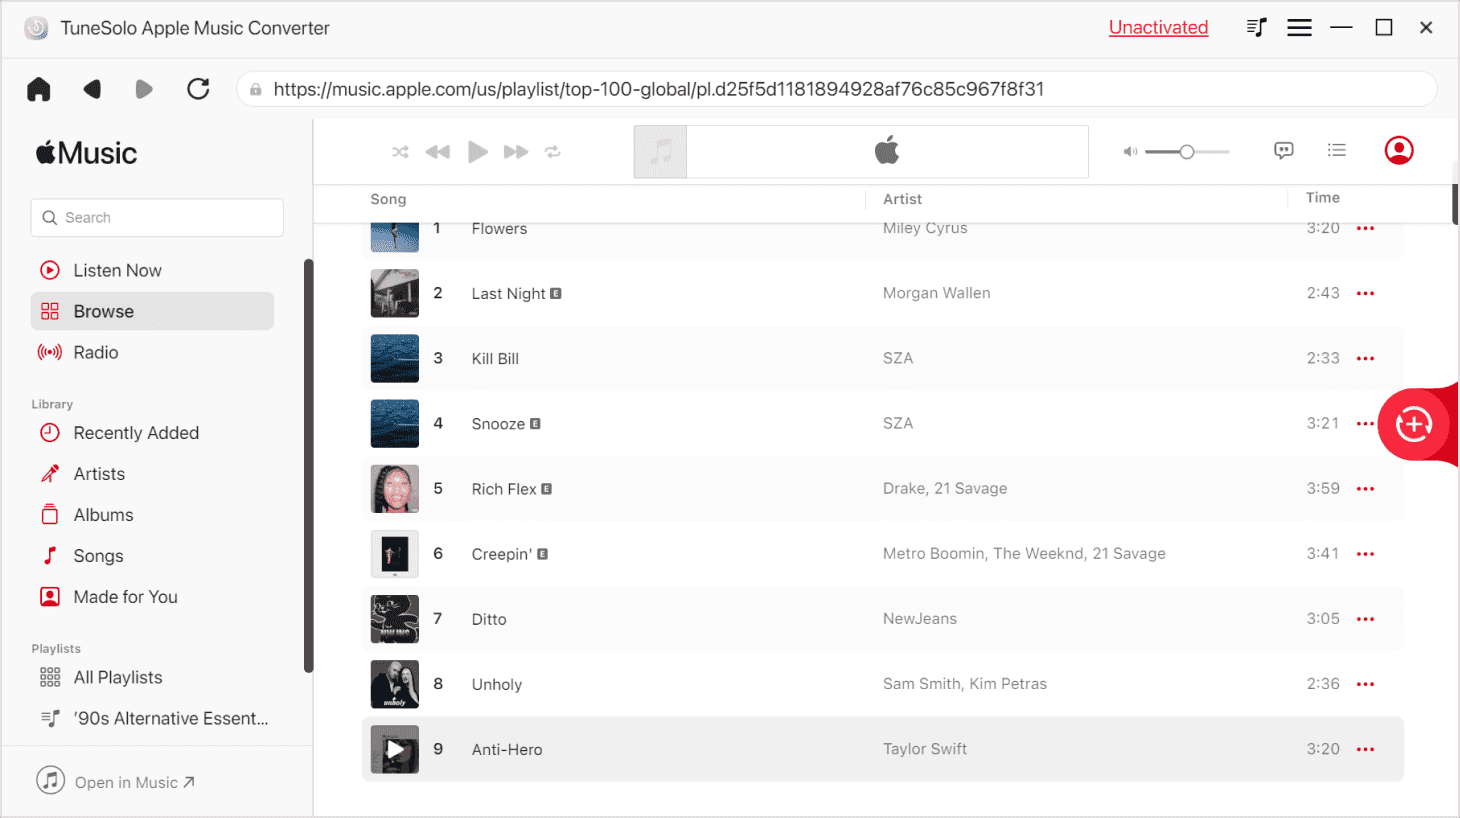
Step 2: After the successful installation of the TuneSolo Apple Music Converter, the next step that you must do is the selection of iTunes music files. You will be selecting the tracks from your iTunes music collection. Your music collection will automatically load once TuneSolo has successfully read all of them.
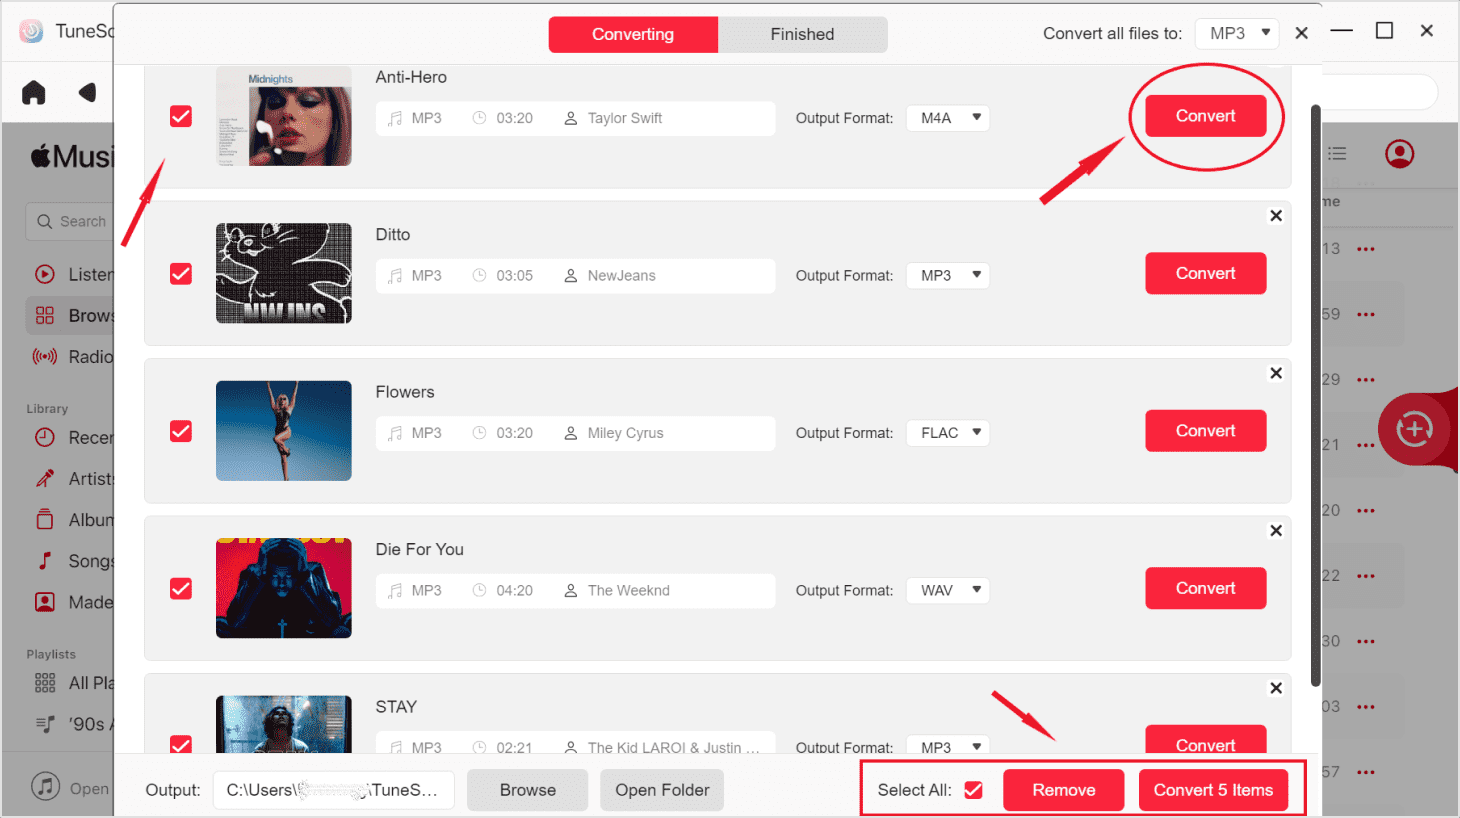
Step 3: Right after the music file selection, you will have to choose the output format of the songs. You may choose one from MP3, WAV, AAC, and FLAC. You should select an output folder as well to make it easier for you to locate the converted iTunes tracks once the conversion process was done.
Step 4: If you are already set and okay with all the adjustments you made, the selection of output format, and the output folder, you may now click the Convert button. Hitting on this button will automatically have the entire process started. You will just have to wait for a few minutes until TuneSolo Apple Music Converter has already converted the songs into the output format you selected in the previous step.
With the help of the fast conversion speed of TuneSolo, you will not have to wait that long. Once the files are already saved as local music files on your computer, you may now proceed with how to transfer music to Fitbit Versa from iTunes procedure. In order to proceed, you will have to install the Fitbit Connect app as well. The instructions on how to transfer music to Fitbit Versa from iTunes via Fitbit Connect are just the same with this case.
Part 4. Conclusion
Knowing that it is possible to put iTunes music to Fitbit Versa and consequently knowing how to transfer music to Fitbit Versa from iTunes is really a big help especially if you wish to bring your music with you, any time of the day and anywhere you want to go. The above-mentioned methods are all of the great help especially TuneSolo Apple Music Converter.